
This post contains affiliate links. If you buy through one I may earn a small commission at no cost to you. Prices checked September 23, 2026.
Bedazzled nails are up 200% on Pinterest right now, and every single result when you search how to do them is a video. Nobody has written down the actual steps, which is a problem when you are standing at your desk with tweezers and a pile of rhinestones that keep flipping over.
Here is the whole thing in writing. Total cost is about $25 for supplies that will do twenty-plus manicures.
What you need, and what you do not
- Flatback rhinestones in mixed sizes. Mixed is the point — one size across a whole nail reads like a craft project.
- A wax pencil. This is the tool that makes the difference between five minutes and forty. Tweezers drop stones; wax picks them up every time.
- Nail glue or a thick clear gel made for rhinestones. Regular top coat is not strong enough on its own for anything above about 3mm.
- A clear top coat for sealing around the edges.
- Skip: the UV lamp, unless you already do gel manicures. You do not need one for this.
The supplies
How to do it
- Start with fully dry nails. Polish that looks dry is often not dry underneath. Give a normal manicure a full hour, or do this on bare nails or press-ons. Stones set into soft polish sink and go crooked.
- Plan the layout before you glue anything. Tip a few stones onto a paper towel and arrange the design next to your nail first. Once glue is down you get about twenty seconds.
- Put glue on the nail, not the stone. A dot slightly smaller than the stone. Glue on the stone squeezes out the sides and dries cloudy.
- Press the wax pencil onto the flat top of the stone, lift, set it into the glue, then press down gently with the other end or a fingertip. Wax releases easily once the stone is stuck.
- Work biggest to smallest. Place your feature stones first and fill gaps with the small ones. Doing it the other way around leaves you nowhere to put the big ones.
- Let it set for ten minutes untouched. This is the step everyone rushes and it is why stones fall off the same night.
- Seal around the base, not over the top. Run top coat around the edges of each stone where it meets the nail. Coating the whole stone dulls the sparkle, which defeats the entire exercise.
Where to put them so it looks intentional
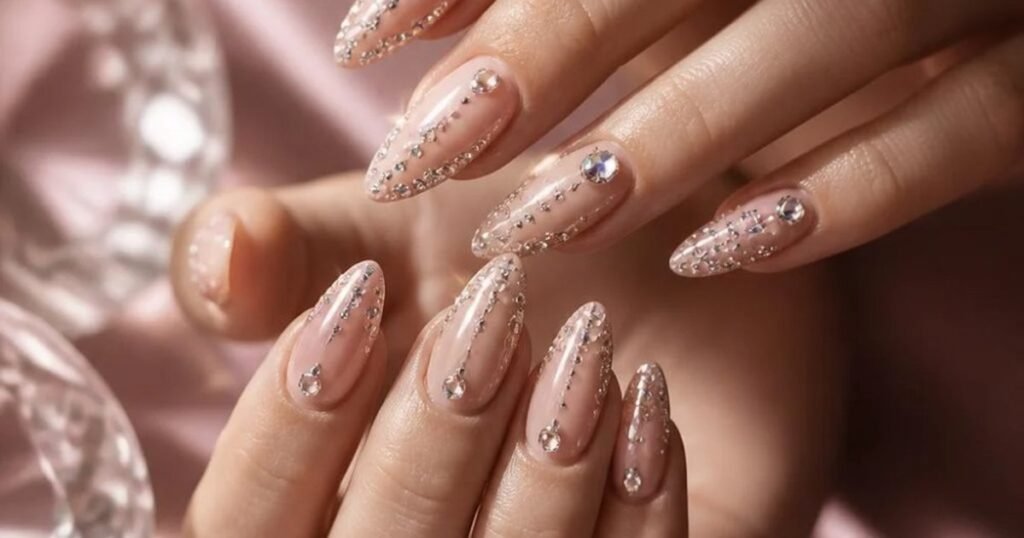
- One accent nail. Ring finger, fully covered, everything else plain. Easiest and hardest to get wrong.
- A cuticle line. A curved row of small stones along the base of each nail. Elegant, and it grows out gracefully.
- A scattered half. Dense at the cuticle, thinning toward the tip, so it fades out instead of stopping abruptly.
- French tip outline. A row of tiny stones along the smile line of a french manicure.
How to keep them on
- Expect three to five days on natural nails, longer on press-ons.
- Wear gloves for dishes. Hot water and detergent are what loosen the glue.
- Reglue rather than redo. One stone pops off, you have the glue right there.
- Do not file after applying. The vibration works stones loose.
Taking them off without wrecking your nails
Soak in warm soapy water for ten minutes, then lift each stone from the side with a wooden cuticle stick. Do not pick or pry dry — that is how you take the top layer of the nail with it. Leftover glue comes off with a light buff and a little oil, the same way press-ons do.
The safest surface for this is a press-on you can remove whole: how to take press-ons off without wrecking your natural nails, and the best press-on sets under $15.
What a salon charges
Rhinestone work at a salon usually runs $5 to $15 per accent nail on top of the manicure price, and a fully bedazzled set can double the bill. The supplies above cost about $33 total and last through twenty-plus sets, which is the entire argument for doing it yourself.
Keep reading
- Nail Art Supplies on Amazon for Beginners (Easy Designs for Under $20)
- The At-Home Manicure Kit: 7 Amazon Nail Tools That Make DIY Nails Look Salon-Done
- Peeling, Breaking Nails? 7 Amazon Nail Strengtheners and Cuticle Oils That Help
- The Best At-Home Gel Nail Kits on Amazon (Salon Gel Manicures for Under $40)
- How to Take Off Press-On Nails Without Wrecking Your Natural Nails
Pingback: How to Remove Press-On Nails Without Damage